We definitely aren’t the first ones to say this, but Utah is simply the best American state for visiting National Parks (chill out, California and Washington—you know we love you, too).
But seriously, Southern Utah is just incomparable when it comes to the beauty, majesty—and convenience—of five different National Parks that are all within a four hour drive.
We don’t even talk about Capitol Reef in this post (although it’s one of our underrated favorites!), and are highlighting four different Utah parks we recently tackled on the kids Spring Break (yes—they have a two week Spring Break, and it’s awesome to have that much time).
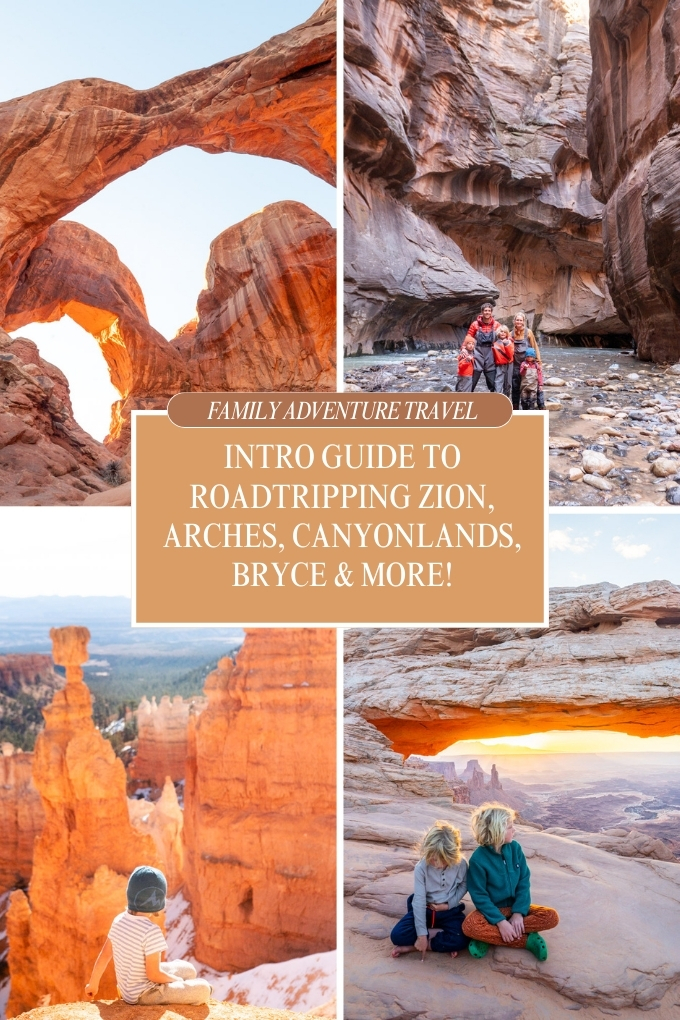
From iconic arches to stunning canyons, we explore Arches National Park, Canyonlands, Bryce Canyon, Zion, and well as Kanab and Page, Arizona, because—hey they’re there, and why not?
So, what’s the first step? Book your roadsurfer campervan (they have a convenient base in Salt Lake City! Grab your hiking boots, load up on some food, and get ready for an unforgettable family adventure in the Southern Utah desert.

Where to stay when you’re with your RV: If you can find an open reservation, I highly recommend booking inside the National Park campgrounds, and while they usually have pretty basic facilities compared to private campgrounds or RV parks, being able to wake up right in the park for an early start or a sunrise adventure is worth it every time.
Yes—the campgrounds fill up quickly, but if you aren’t able to snag one in advance, be on the lookout for cancellations in the days leading up to your trip. Some parks even hold a few campsites and don’t release them until 2 weeks before!
Or, if you simply aren’t able to book a campsite, just look up RV parks in a nearby town, since it can be nice to get the added amenities, like laundry, a dump station, or hot shower!


Day 1: Arrive into Salt Lake City
Pick up your camper van with Roadsurfer in their Salt Lake City location, and depending on what time you arrive in Salt Lake City, you can visit the Natural History Museum of Utah, or explore the capital’s downtown.
Or if it’s early in the day and you just can’t wait for the desert adventure, stock up on supplies and head to Arches National Park—about a 4 hour drive from Salt Lake.
If you can score a campsite then stay directly inside Arches National Park, but there’s also amazing BLM land alongside the Colorado River (no cell service!). Or, if you want to be closer to Moab and the conveniences of being in town, check out one of the numerous RV parks—we stayed at Village Camp and it was the perfect basecamp, with a shop, showers, and a pool!

Day 2: Arches National Park
Start your day with an early hike to the iconic landmark, Delicate Arch (3 miles roundtrip). This is arguably Utah’s most famous landmark (it’s literally on the license plate)—so don’t be surprised if you aren’t alone.
Pack a picnic lunch and explore throughout the park, including short, easily accessible trails, like Balanced Rock, which is only (.3 miles).
In the hours before sunset, snag a parking spot in the The Windows section of the park and watch fiery colors illuminate the rocks at Double Arch , Window Arch, or if you’re up for it—visit them both.
Tip: You can stay in Arches campground and drive to Canyonlands the next day, but if you want to enjoy sunrise in Canyonlands, I’d recommend trying to score a spot there.

Day 3: Canyonlands National Park
Another early wake up, but let me tell you—it’s worth it. If the pre-dawn hike to Delicate Arch seems impossible with the family, then head to Mesa Arch in Canyonlands National Park, which is just 0.5 miles round trip!
One thing we loved about Canyonlands National Park is how the Island in the Sky District has so many overlooks, viewpoints, and stops that offer amazing views just steps from the road, so if you (or the kids) aren’t up for much hiking—but want to enjoy the canyon views—then just enjoy the views from roadside stops like Shafer Trail Viewpoint, Grand View Point, Whale Rock, or Green River Overlook, which is one of the best places to watch the sunset in Canyonlands National Park.


Day 4: Corona Arch Hike and Bryce Canyon Sunset
Since we stayed right in Moab, we wanted to do one more mini-adventure before the 4-hour drive to Bryce Canyon National Park, and Corona Arch is the perfect spot for stretching your legs, getting some energy out, and experiencing some of the unique desert landscape that’s outside of the national parks. Plus you get to drive on the famous Potash Road, where vertical red cliffs rise inches from the pavement, and climbers of all ages are roped into harnesses and scaling the rock face right next to the road.
The Corona Arch hike is 3 miles round trip, and has a short ladder and chain section, which makes it exciting for the kids. Is Corona Arch dangerous? Nah—just watch your kids. We read some sites saying it has sketchy drop offs and it’s way too dangerous for kids, but as long as you stay away from the edge (and there’s A LOT of room to stay away from the edge), then it’s an awesome Moab day trip.
Have lunch in Moab at Bonjour Bakery & Café and then set out for the trek to Bryce Canyon National Park. There’s a whole lot of nothing to see along the way, but a worthwhile stop (if you have the time) is the John Wesley Powell History Museum in the lonely town of Green River. You can learn about the pioneering river expedition from southern Wyoming all the way through the Grand Canyon, and then pick up some food at Tamarisk restaurant (amazing diner vibes!) located right across the street.
From here it’s a straight shot to Bryce Canyon National Park, you can either stay in the North Campground, or Ruby’s Inn RV Park and Campground, just outside the park boundary.
Wherever you stay, be sure to arrive before it gets dark so you can sneak in sunset from Sunset Point, just a three minute walk from the parking lot.

Day 5: Bryce Canyon National Park and Kanarra Falls
Rise and shine! It’s a big day, and this day starts early by taking in the sunrise at the aptly-named Sunrise Point, where you can watch the light illuminate the hoodoos that spring from Bryce Canyon’s famous desert amphitheater.
Arrive at sunrise ready for a hike, because from here you’ll enjoy the 3-mile loop trail that connects the Queen’s Garden Trail with the Navajo Loop Trail for a classic stroll through some of Bryce’s Canyon’s most iconic and famous formations. Even though it’s relatively short, the climb back up can be pretty steep, so be sure to pack water, snacks, and footwear from a moderate day hike at altitude.
It’s about 8,000 feet elevation up here, so take it slow when your out on the trail (although kids will probably want to run the whole time since the trail looks exactly like a motocross track).
Once you’ve conquered the Bryce Canyon amphitheater (admittedly this itinerary doesn’t give Bryce Canyon enough attention, since there’s SO much more to explore), strike out for Kanarraville and Kannarra Falls, but make sure you’ve gotten your permit!


This waterfall hike through a tucked away slot canyon is capped at 180 hikers per day, and at $15/head for kids over 8 (accurate as of March, 2025), this hike will cost you a little bit of money, but trust us—it is, so, SO worth it!
Yes—we know you already did a hike, but this one is totally different. This 4-mile hike winds back into the hills, where you criss cross the river numerous times (yes, your feet will get wet with cold water—just expect to get soaked from the knees down), and end up at a slot canyon where the waterfalls tumble and thunder right through the canyon!
Seriously—one of Southern’s Utah’s most unique hikes, considering the water element, narrow slot canyon, and the fact that it’s (relatively) easy and accessible—just be careful with small kids during snowmelt season (April and May), since water levels can change pretty quickly.
And yes, this hike can get kind of crowded, but in mid-March we started our hike just after 2pm, and we only encountered two other people, since the mornings seem to be way more popular.
Plan on four hours to do the whole hike, and from here it’s only a 50-minute drive to the town of Springdale, gateway to Zion National Park, where you’ll enjoy the next two days.
We stayed at the Zion Campground and Cabins (expensive—but so is everything in Springdale)., and yes, we spent an extra $20 for a campsite next to the Virgin River, but considering the boys spent a solid hour just playing by the river, the extra money was worth it.


Day 6 Zion National Park
Whew—are you tired yet? Hope not, because you have two days in one of America’s most amazing national parks: Zion!
This place is SO MUCH busier than it used to be, and if you don’t like crowds, well…maybe visit in winter. The park has taken measures to limit the crowding, so if you’re visiting from March-November, you have no option (other than e-bike) than taking the park shuttle if you want to drive the Zion Canyon Scenic Drive.
Our suggestion? Catch the 7am shuttle from the visitor center, and you’ll at least escape a few of the crowds.
Spend the day exploring Zion Canyon, or if you’re feeling adventurous (and got a permit), tackle the famous Angel’s Landing—but only if you aren’t afraid of heights.
You might be tempted to drive through the historic Zion-Carmel tunnel and hike the Canyon Overlook Trail, but be sure to think twice if you have an RV—any vehicle over 11’4″ high, or 7’4″ wide, needs to purchase a tunnel permit for $15 (you can get the at the park entrance stations), which allows you pass though the tunnel twice.
But here’s the thing—oversize vehicles can only pass through the tunnel until 4:30pm! That means if you try and hike the Canyon Overlook, but are staying in Springdale and don’t make it back through the tunnel by 4:30pm, your 15 minute drive just turned into 3 hours to drive the long way around!
Repeat: If you’re driving an RV, you need to plan your day accordingly if plan on going through the tunnel. Plus, finding parking is a nightmare. If you find somewhere to park the RV, consider it a Zion miracle.
A better plan? Spend the afternoon at Zion Guru, where you can get fitted with your drysuit, waders, and gear for getting up early and hiking the Narrows.
This once-in-a-lifetme Zion hike takes you up the Virgin River where you walk between walls that soar 1500 feet from the river, but the water is cold—super cold—so you’re going to want the right gear.
Zion Guru has a shop right in Springdale, and get you set up with the proper equipment on the afternoon BEFORE you start the hike, so you’re ready to rock first thing in the morning (remember: 7am shuttle!)
Once you’ve gotten your walking stick and waders, finish the day with a burger and beer from the Zion Brewery right in town.

Day 7: Zion National Park (The Narrows)
First thing to do when hiking the Narrows is check the river gauge. It needs to be below 150cfs, or the pars service will shut down the hike. Zion Guru has an amazing page about hiking the Narrows that show live river measurements as well as maps and info on conditions, itineraries, and gear.
As long as conditions are good for hiking, this is arguably one of the most memorable. epic, scenic, and adventurous hikes you’ll do in your life. Catch the 7am shuttle from the visitor center (they run every 10-15 minutes if you miss that first one), and take it all the way to the last stop at the Temple of Sinawava. From here it’s a mile walk on paved walkways until you reach the river, at which point you can choose how far you want to walk back into the scoring canyon.

We spent about 6 hours total in the canyon, and made it back to where the river splits, to the famous section know as Wall Street. The hike back is easier than the way up, since you’re walking with the flow of the river, as opposed to walking against it. Also there’s more sunshine and warmth on the way back, since mornings in the canyon can be cold!
Return the gear, spend the night in Springdale, and celebrate the epic adventure.


Day 8: Kanab
Get an early start and be at the Zion-Mt. Carmel Tunnel by 8am. If you’re in an RV, be sure you got a tunnel permit, and if you can find parking, hike the Zion Canyon Overlook Trail on the opposite side of the tunnel.
From here it’s a short, 45 minute drive to the adventure base of Kanab, where you can stop at the Sand Caves on the way into town for a short climb up into an abandoned sand mine that makes for some great photography and climbing for the kids.

You can also stop along the way and hike to the Belly of The Dragon, which we personally didn’t have time to do, but it’s another popular stop.
Once in Kanab, grab lunch downtown, check into an RV Park just outside town (we stayed at Dark Sky RV Park a few minutes from town, which has showers and comfortable, clamping style cabanas with lounge chairs and propane fire pits), and just relax and enjoy the evening in Kanab, while watching the stars come out. This area has some of the country’s darkest skies—be sure to look up before you go to bed!
Day 9: Kanab, Peekaboo Slot Canyon, and The Great Chamber
It’s another early morning of checking in for your adventure with Kanab Tour Company in town! This local company has UTV trips, hiking tours, and all sorts of adventures to some of Kanab’s most popular spots—most of which are inaccessible, unless you have 4WD.

If you’re in your own 4WD car (not all wheel drive), you can do these adventures on your own (or try to), but if you’re in an RV you don’t have any other choice than to book a trip with a guide.
Trust us, though—the adventure is worth it, as you can choose from trips to Peekaboo Slot Canyon and The Great Chamber, to hiking tours to White Pocket.


Check in is as early as 7am (but there’s a coffee shop right inside the store), and by 7:30am we were driving UTV’s back into the red rock desert, en route to Peekaboo Slot Canyon.

Depending on which adventure you choose you’ll be back by early-mid afternoon, and when it’s time time leave town, point your rig easy on Highway 89 for a sunset hike at Toadstool Hoodoos, just 40 minutes easy of Kanab.
These otherworldly rock formations spring up from the multi-hued desert, and sunset is definitely the time to visit, when the colors in the rocks come alive. It’s a 1.5 mile hike (roundtrip), so it’s an easy family sunset hike after a big, adventurous morning, and kids will love running and jumping down the trail—highly recommended if you can make it!


Drive over the border to Page, Arizona, and stay at Roam America Horseshoe Bend RV Park.
Day 10: Page, Arizona
Yes—Page isn’t technically in Utah, but it’s so close to the Utah border that your phone will constantly be be switching time zones, because it can’t figure out where you are.

Start the day with a short walk back into the “gas station cave,” which is literally right behind the Shell gas station, just a few minutes from the RV Park. This is one of those spots that got famous on Instagram and has annoyingly kind of blown up, but you know what—it’s actually a pretty cool cave, you should definitely still check it out. Go early enough and there’s still a chance you could have the place to yourself.


From here head over to Horseshoe Bend to for a view of the famous, horseshoe-shaped turn in the Colorado River, and just be sure to stay away from the edge—especially if traveling with young kids. You’ll need to pay to park, and on busy days when the parking lot is full, you just need to come back another time. We visit at 10am in mid-March, and there was still plenty of room.

Snap a quick pic of the bend in the river, and then hightail it over to Lake Powell Paddleboards and Kayaks for an afternoon paddle to Antelope Canyon, where you can paddle and hike your way up Lower Antelope Canyon for a multi-sport family adventure.


Spend the night in either Page or Kanab, depending on your plans for the next day.
Day 11: White Pocket and Coral Pink Sand Dunes
We’ll be honest—we never made it to White Pocket, and it’s probably the biggest regret of our trip!
You can book trips to White Pocket from either Page or Kanab, but we’d probably recommend starting from Kanab so you can make it to Coral Pink Sand Dunes by sunset.
Try and snag a campsite at Coral Pink Sand Dunes State Park, and if the spots are all full, there’s a BLM campsite up the road at Ponderosa Grove.


Just watching sunset from the dunes is an activity unto itself, but the real adventure out here is sandboarding, and you can rent the boards directly at the park. It’s a ten minute trek out onto the dunes, and fair warning—you’ll be washing sand out of your hair and pockets for about the next 2.5 years.
Still, it’s a fun, unique, and adventurous way to bring this whirlwind, Utah family adventure road trip to a close.
Day 12: Drive Back To Salt Lake City
All good things must come to an end, and from Coral Pink Sand Dunes it’s a 4.5 hour drive back to Salt Lake City.
This post contains affiliate links, although all thoughts and comments are our own.